Bead Your Own African Shekere

traditional-shekeres-from-around-the-world- A shekere (or sekere) is a beautiful and unique instrument originating in West Africa that appears in various shapes, sizes and forms throughout the continent of Africa.  Made from a simple dried gourd with a beaded “skirt”, shekeres are a great addition to any environment where children are learning about music or world cultures.

mini shekere for storeIf you’re finding it hard to locate or purchase a shekere for your classroom, home or homeschool, you might consider making your own.  Other then the dried gourd, the additional materials are easy to find and the beading process is “easy to moderate” for beginning crafters.  In fact, since the stringing and beading is the part of the process that generates the most questions and confusion, we’ve partnered with Carrie P. from a wonderful blog called Crafty Moms Share to develop a step-by-step tutorial for making your own dried gourd shekere.  (Complete gourd tutorial and other related shekere posts can be found at the links below).

beads for shekere kitsBeads, Seeds, Nuts or Seashells

Along with beads, almost any small, roundish, rattling object can be used as the noise-makers on a shekere.  If you take a close look at the shekeres pictured above, you’ll notice beads as well as seeds woven into the netting.  In Africa, some shekeres also use seashells or hard seeds or nuts with holes drilled though them as part of their unique design.

Add Some String

The skirt of a shekere is created from a type of string or twine that is durable and will not break or stretch.  Since cotton twine will stretch, nylon or hemp is a better choice for creating a working shekere.  Because the top circle or collar of the netting holds all the other strings in place, some craftspeople pick a thicker string for this or braid the twine for a more durable start to the project.

shekere skirt no beadsAnd Some Knots!

With your collar in place around the gourds neck, you are ready to add the strings.

Cut a number of strings (enough to fit around the gourd) approximately 30 inches long.  Fold each string in half and make a slip knot with it around the collar.  To make a slip knot, put the folded string under the collar with the fold on top and then bring the ends through the loop of the fold and collar and tighten.

Once you have all the strings you desire in place you will tie a loop knot to secure each location. A loop knot is where you make a “6” with your strings and bring the end through the loop of it. This is the type of knot we will be using for the rest of the project.

starting to beadAdd The Beads

Here are Carrie’s great suggestions for getting the hang of adding beads to the skirt:

Adding the beads is where you creativity really comes into play.

You can do many different things with the beads. Some put a bead on each string, others put two strings through a bead. Some put a single bead between knots and others go up to three beads before knotting. The important thing is to work with a string from two different knots.

Once you have your bead(s) in place, tie a loose loop knot. I re-started many of mine because I did not like how the first round looked and found they lay better with looser knots.  Do an entire round before starting the next.

Once you have one round complete, start the next.  Stay consistent with however you’ve started with beads and knots, but again you want to use strings from different knots. This will bring the beads in the first round closer together. Continue doing a round at a time until you have the skirt you want.

finishing the bottomFinish The Instrument!

Here are Carrie’s two descriptions for two methods of finishing the skirt and completing the shekere:

Method 1: The first is to have another loop similar to the collar (braided if you used braided) and the same size. Then you tie your ends to the loop so it hangs loosely below the gourd.

Method 2: If your gourd is small you can take an 8-inch string and tie the ends together. This is easier to do with another person holding your shekere for you to tie them together.

colorful kids shekere beadedMaking Music!

If you take a look at the resources below you’ll find many wonderful ways to check out the sound of traditional shekeres or explore music with the ones you’ve created.

Enjoy!

Complete Tutorials

http://www.teacherspayteachers.com/Product/Make-Your-Own-Shekere-African-Percussion-Instrument-Tutorial-992550

http://dariasvillagestore.storenvy.com/collections/34585-all-products/products/4084121-make-your-own-shekere-african-instrument-tutorial

tall-and-thin-sekere--PMLinks and Resources

Hear A Shekere
http://www.dariamusic.com/shekere.php

Color a Shekere Online
http://www.dariamusic.com/color_Shekere.php

Carries Crafty Moms Share Blog
craftymomsshare.blogspot.com/‎

Sekere.com – Beaded Sekeres from Master Craftswoman, Sara Fabunmi
http://www.sekere.com

Cultural Value of the Shekere, Article By Sara Fabunmi

THE CULTURAL VALUE OF THE SEKERE

Make a Classroom Shekere (From A Gourd)
http://tinytappingtoes.wordpress.com/2013/08/05/easy-gourd-shekere-for-a-child-or-a-classroom/

Make a Recycled Shekere (From A Milk Jug)
http://www.dariamusic.com/make_Shekere.php

An Alphabet Shekere Game
http://www.trueaimeducation.com/2012/10/guest-post-learning-letters-with-an-alphabet-shekere.html

It’s A Caxixi!

caxixis 4 lying downCaxixi (pronounced ka-shee-shee) rattles are beautifully woven, small, hand percussion instruments that can be found in Africa and South America.  These simple rattles have a flat piece on the bottom originally made from a dried gourd.  Modern caxixis can have plastic or metal bottoms as well.  The rest of the rattle is a woven “basket” that holds small items which create the sound when it is shaken. The basket area is made of pliable fiber and can be one color or beautiful patterns of colors woven together.  Some caxixis have two baskets attached to one handle.

Although this instrument may look quite simple, a caxixi rattle can make a wide variety of sounds.  You can shake the contents against the softer side of the woven rattle for one sound or against the harder bottom part for another tone.  Skilled percussionists can create some really intricate rhythms with caxixis and they are often used by singers in West Africa when performing with a drum group.  In Brazil, the caxixi is often seen creating the percussion sound for a unique stringed instrument called a birembau.

On modern jazz recordings, you can frequently hear the caxixi played by Brazilian percussionist, vocalist and berimbau player, Naná Vasconcelos.

Make Your Own Caxixi

If you are up for some serious crafting, a Brazilian site called Soul Capoeira shows you how to make real caxixis from fiber and gourds at the post below.  If you’d like to try an easier version from recycled materials – a great project for kids – check out the post from Tiny Tapping Toes, below.

During the month of August 2013, you can win a caxixi rattle in an easy Rafflecopter contest here:

http://www.dariamusic.com/monthly_song.php

Links

Soul Capoeira’s Make Your Own Caxixi Post – From Reeds or Rattan and Gourd Shells

http://soulcapoeira.org/music/how-to-make-a-caxixi/

Make Your Own Caxixi From Recycled Materials

http://www.tinytappingtoes.com/uncategorized/make-your-own-woven-caxixi-rattle/

Play A Kalimba (Thumb Piano) Online!

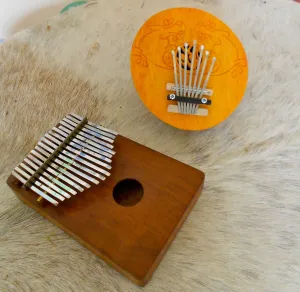
Thanks to PBS Kids’ Go, you can actually play an African style thumb piano online.  Check out the link below.  In addition to being able to “play” the instrument (touch the tines and hear the sound), you can record your own tunes – what fun!

On this website you can also explore other related aspects of African culture such as traditional masks and how to make them and a Swahili folktale about Prince Sadaka.

Kudos to PBS Kids for creating such fun and interactive resources that share, preserve and inspire kids to learn more about traditional cultures!

Thumb Piano Player
http://pbskids.org/africa/piano/noflash.html

Make a Mask – (Rabbit, Bird, Antelope and Hunter Masks)
http://pbskids.org/africa/mask/index.html

Swahili Folktale
http://pbskids.org/africa/tale/index.html

She Made a Homemade Mbira

Two actual kalimba/mbiras from DARIA's live music shows.

Leah from the Almost Unschoolers blog decided to take on the project of creating a homemade mbira (kalimba) while studying Kenya with her kids.  A complete list of supplies and tools she used for this craft are listed below plus a link to her inventive and creative blog.

homemade mbira - getting started with the basic materials

Leah started with a block of wood and added two popsicle sticks to it with hot glue.  This would create an area where the bobby pins would be higher then the wood block so they could be plucked.

After cutting the bobby pins in half, she shortened each one just a bit.  By doing this, the variation in length would create a slightly different sound for each “tine” or bobby pin when plucked.  Leah used four bobby pins here but you can experiment with any number of bobby pin “tines”.

bobby pin tines are hot glued in place

Then she taped the bobby pins in place in the order she wanted and hot glued two more popsicle sticks on top.  She tightened the sticks by adding pushpins.  Finally, she bent the bobby pins up to about a 45 degree angle.   At that point, the little instrument was ready to play.

Her kids jumped right in and began to pluck and play.  Although, it didn’t sound exactly like the kalimbas or mbiras they had checked out in sound clips on the internet, it still was a good working instrument that was fun to explore.  It also was a great experiment in encouraging kids to think about how instruments were invented or improved using only the simplest of materials.

Leah's homemade mbira - ready to play

What did the homemade mbira pictured here sound like?  Leah’s one son thought it sounded like a “dying grasshopper”.  You can hear a sound clip for yourself if you check out her complete post:

http://almostunschoolers.blogspot.com/2012/02/homemade-mbira-for-children-african.html

Supplies/Tools

A block or piece of wood
Four popsicle sticks
Bobby pins
Hot glue gun/craft glue
scotch tape
wire cutters
safety glasses (for use while cutting bobby pins)

Make A Sticker Shekere

Have you ever seen a shekere from Africa? It is a beautiful musical instrument made from a dried gourd that is shaken, tossed or moved from hand to hand creating wonderful rhythms and songs.

Here’s a picture of several traditional shekeres from a variety of countries:

Traditional shekeres (or sekeres) are most often made from a type of squash called a birdhouse gourd that grows in many locations around the world.  It is grown, dried and about a year later, ready to be turned into an instrument. When the outside of the gourd hardens into a thick shell,  it is strung with a netting that fits loosely around the rounded part of the gourd.  Beads, seeds, shells or other rattling objects are attached to the netting to create the percussive sound of the shekere.

Since gourds may be hard to find and take some time to dry, here is a simplified version of this musical craft that uses stickers and recycled milk jugs.  Also, working with netting and beads can be difficult for tiny hands, so this craft allows young children to create beautiful patterns that are unique and still have an instrument that is fun to play along with African songs or any uptempo music.  A complete supply list for this project is below.

MAKE YOUR OWN SHEKERE
First, wash and clean your milk jug and keep the lid or cap. If you are working with many children, you may wish to put each child’s name on their milk jug for identification, should some of the shekeres look similar. Next, allow your students to do their beading, either free form by applying stickers anywhere on the milk jug or you can draw string patterns for them to show where a bead or sticker would go.  If you like, you can talk about patterns of colors and different ways that patterns can be created.

Once your shekere is “beaded”, then add the filling. Fillings that create quieter shekeres are sand, salt, sugar, Q-tips, seed beads or tiny pasta such as pastina. Slightly louder shekeres can be made with fillings like paper clips, bird seed, rice, pony beads, or smaller beans such as lentils. Louder shekeres can be created by adding large dried macaroni, or beans, pebbles, larger beads or even jingle bells.

After filling your shekeres, seal the instrument with sturdy electrical tape by wrapping it around the lid and the top section of the plastic jug. This way the contents are secure inside, especially if working with younger children. If you can find colorful electrical tape, it adds a nice design element.

A HANDLE FOR YOUR SHEKERE
If you like, add colorful yarn or pipecleaners to create a handle for your milk jug shekere.

PLAYING TIPS
The shekere can be played like a rattle, simply shaking it around. It can also be held in one hand and then tapped on the other hand, like you might play a tambourine.

It can be tossed gently from one hand to the other. It can be played by tossing gently from one person to another and works well in a circle.

Some players “burp” their shekere.  They hold it in one hand and tap the bottom with the other hand.  On gourds, this creates not only a rattling but an “ah” sound. If you try this with your milk jug shekere, you’ll get a rattle and a tap, a nice percussive effect.

What other sounds can your sticker shekere make?  Explore it and find out.

Hear a shekere here:
http://www.dariamusic.com/shekere.php

Color a shekere online here:
http://www.dariamusic.com/color_Shekere.php

Check out this great traditional song from South Africa:
www.vimeo.com/dariamusic/here-come-our-mothers

SUPPLIES FOR THIS PROJECT
Plastic milk jug, (rinsed out, with lid)
Stickers (such as paper reinforcements or the little round stickers used to price items at garage sales).
Permanent Marker, if you wish to draw string patterns on the plastic jugs
Colorful yarn or string for handle
Filling for the shekere – such as bird seed, dried macaroni, beans, beads, rice, sugar, salt, paper clips or small pebbles.
Electrical tape – for sealing the instrument and keeping the content inside